

Convertkit is an Email marketing software that allows you build your email list , create awesome landing pages without having your website and create emails from scratch or templates.
And you dont even need any experience to use Convertkit. Awesome right !
So you have finally decided you need an Email Marketing software. Great because the best so far I know of is Convertkit.
Convertkit makes it so easy to build your email list to 1000 subscribers for free. So What is the catch you may be thinking.
We going to get to that in a moment.
What is Convertkit?
Convertkit is an Email Marketing platform for all creators. This platform allows us creators be it bloggers, video marketers, Youtube creators, agency owners, marketers and any other creator out there communicate our message to our audience and fans.
But Wait , I know what you are thinking you don’t have an audience yet. That’s fine too , you can get started building one and grow together with Convertkit.
Stick around because am going to give you some tips and a cheatsheet to help you step by step build your list using free traffic methods.
In the bonus I have for you as well, you will learn how to even monetize your list and while changing the lives of those you communicate to.
Quick Reminder The Features am Going to mention here are specifically for the Free Plan. which is more than enough to get started.
If you have an email list with more than 1000 contacts you can signup here and claim your best pricing
So What Are the Features Of Convertkit?
There is no need to invest loads of money or waste valuable time figuring out how to start your business at the beginning.
All you need is the Convertkit free platform and the ability to grow your audience.
The Free plan includes:
- Unlimited landing pages
- Unlimited, customizable CTAs & signup forms
- 30+ premium landing page templates
- Unlimited traffic
- Customizable domain setup
- Mobile responsive designs
- Manage up to 1000 subscribers
- Unlimited Email broadcasts
- Subscriber tagging
- Seamless Unsplash integration
- Creator community
With that out of the way , let’s build our audience Step By Step Using Convertkit . First We going to need a landing page if you don’t have a website / sign up form if you already have a website.
How To Create a Landing Page in Convertkit?
Convertkit comes preloaded with a number of free templates easy to customize and no advanced coding is needed.(You even don’t need a website)
However if you would want to get more professional and scale up your business, you going to need to have a website. you can get one up and running through my simple article here
Before we create our landing page, I would recommend you buy a domain as the subdomain of your landing page would not look creditable/professional in the browser.
If you don’t have $3 to buy a domain from namecheap then this next trick will help you try to make your domain look better.
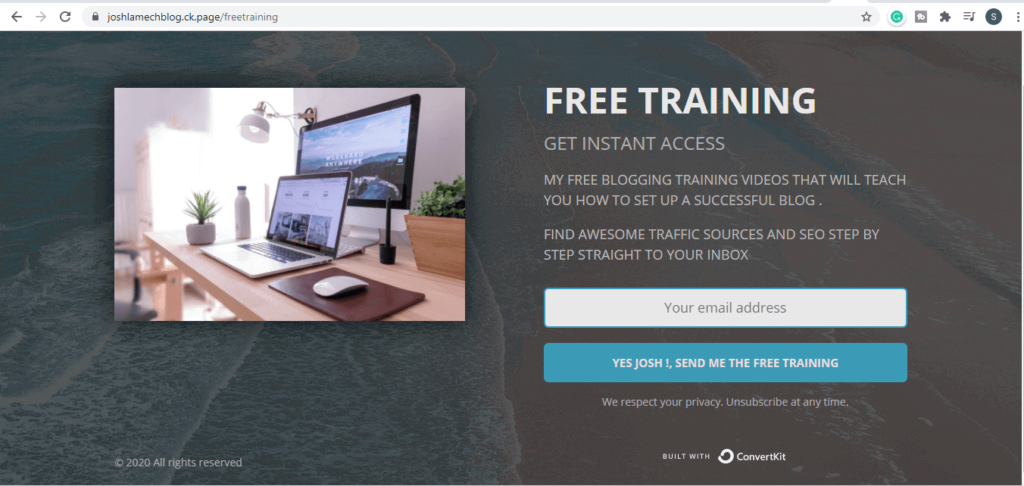

In the image above you can easily see that I tried to make the subdomain look better to joshlamechblog.ck.page/freetraining you can check it out and see for yourself.
So let’s recreate this landing page in our free Convertkit account from a template, then we shall fix up that subdomain.
Step 1
Login into your brand new Convertkit account , confirm your email and to have full access to all free features.
Step 2
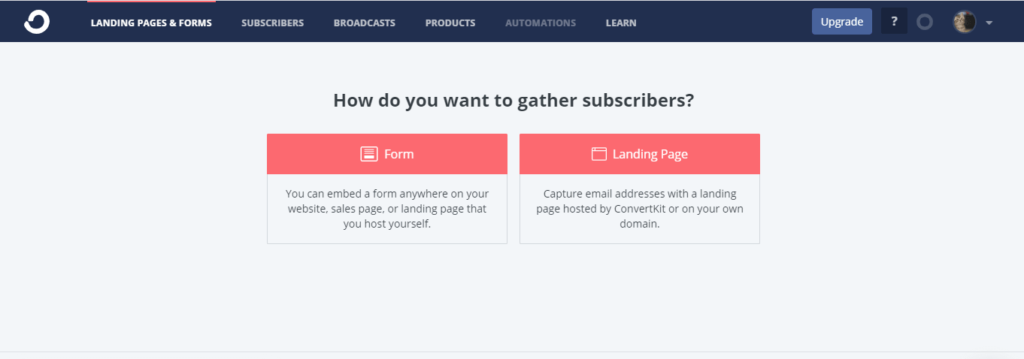
In the menu above , choose the landing page and forms option. Then scroll down the page to find the create new button.


Step 3
Then we choose a template and for this example, I chose between landing pages and forms. We choose a landing page once you need a page to collect leads wihout using or having a website.
To use a form template , you will need a website to embed it .

Step 4
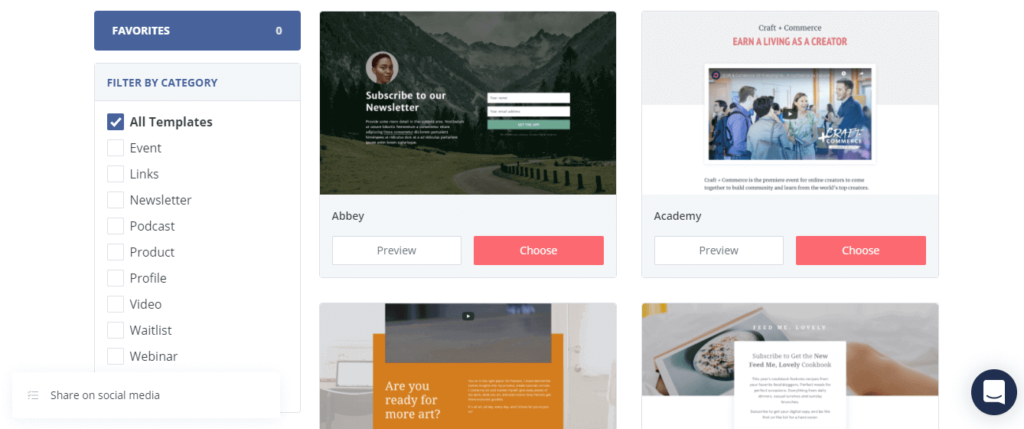
At this point we are going to choose a landing page template and then customize it according to our goal .
They have a bunch of templates from newsletters , webinar signups , video , profile , e-books and so much .Trust me these convert like crazy.
According to my stats with the organic traffic from Facebook, the average Convertkit landing pages I have used convert at 45%-50% while split testing.
Why ?
They are simple and straight forward. The more elements you add to your landing page the less likely people are to optin just because they get overwhelmed.

So when creating a landing page , keep it simple with convertkit. Don’t forget your free account up to 1000 subscribers.
Here is a simple list of the best converting landing pages in Convertkit for building a list.
- Abbey
- Sliding
- Academy (Video landing pages)
- Belmont (For Discounts)
- Camden (For Waitlists)
- Columbia (For Ebooks)
- Hawthorne
- Hall
- Hudson
- Park
- Maple
If you stick to these Landing pages , Trust me you will see awesome results despite your traffic source.
For this Landing page example am using my favorite template “Park”
Customize your landing page according to your interests or goals then I will go over important settings. Don’t forget to add a thank you page.
Here is my sample landing page that you can model or have an idea .
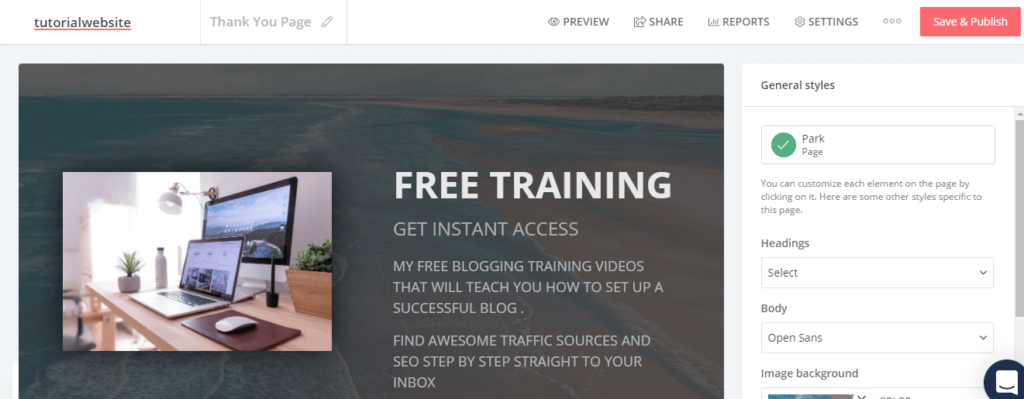

Don’t forget to name your landing page for easy tracing in your dashboard.
Step 5
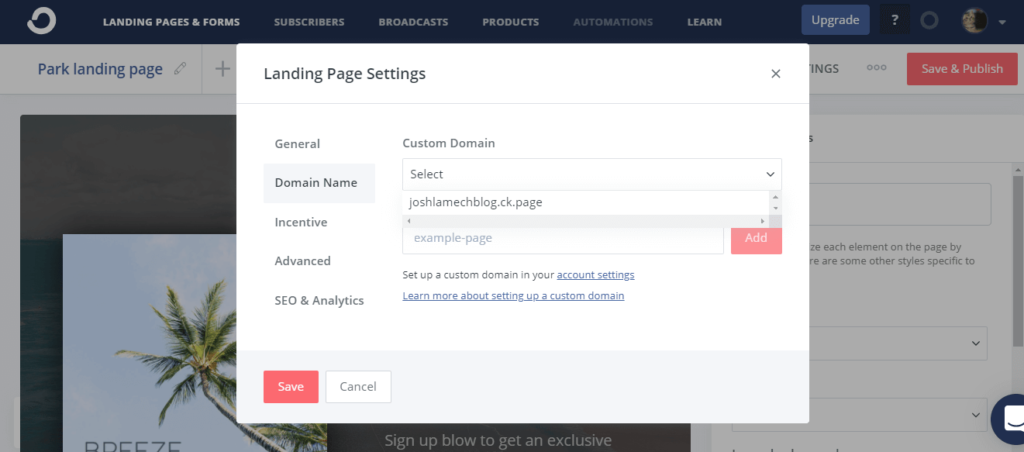
In the settings, choose the domain menu , set up your subdomain and this can be about your niche or category of your lead magnet.
Once you set this up , you can’t delete or edit it. So take time and create a good subdomain.

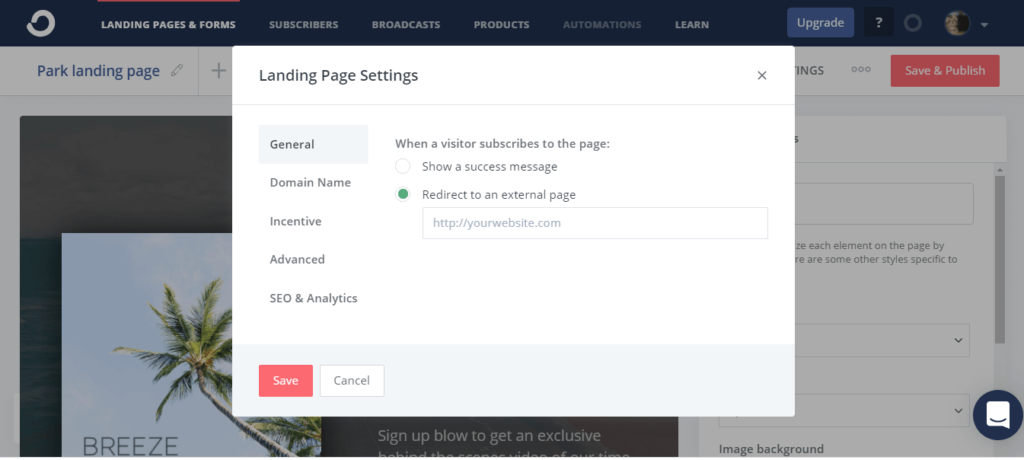
Don’t forget to add a thank-you page with more Call To Action (CTA). You can add a link to your socials, Youtube channel or anything you would wish to promote.
If you don’t add the thank you page, Convertkit will automatically add a success message by default.
If you have an external page you host on your site you can add it as an external link. If you are promoting affiliate products you can add the link here to refer these leads and hopefully make some commissions

You can add an incentive email / double Optin . Some people don’t always confirm your Incentive email.
Convertkit will always encourage you to add an incentive email because this will increase the quality of your Email list.
Convertkit won’t should you the Emails that weren’t confirmed. You will have to apply the filters in the Subscribers menu. You can consider creating separate tags for these leads.
To see any Reports you click on the settings icon on your landing page. But at this point you have nothing here.


With the simple settings in place go ahead and publish your landing page and get your link and am going to show you how to drive traffic to that landing page.
How To Create A Signup Form In Convertkit?
The signup form is a simple form that you can create and embed on your website be it WordPress or Squarespace.
Lets create a simple signup form to add to your website if you have one already.


In the menu above, Click on landing pages and forms. Follow the same format as for the landing page.


Choose the form template , we are going to create a simple form and embed it on our website.
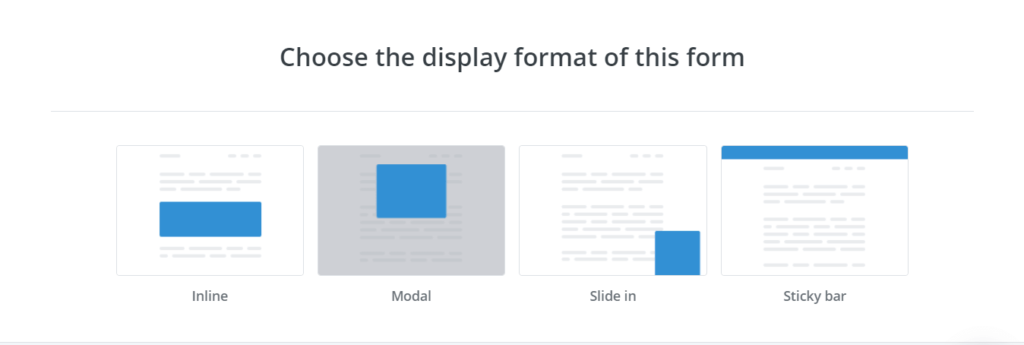

The forms will only look and professional only if you are using a paid plan for Converkit .
Without the “Built with Convertkit” statement at the bottom.
The best form is Inline if you are collecting reading leads from your blog articles. But feel free to use others and see which works for you.
Step 1
Choose the template that you can customize fast and keep it as simple as possible. Am going to use the sticky template an example. “Grove template“


Same to our landing page , we are offering a free training in exchange for their Email.
This form is simple and stands out on the website. Be sure to use a color that pops and captures the attention of your visitors. Don’t forget to give it a name.
Now that you have customized the form , we are going to go ahead and and add an external page hosted on your site to it or a success message . Either case doesn’t matter.
I would prefer having the success message as the visitor stays on your site sending a good signal to google and other search engines , and potentially reading more content to earn you more commissions or sell your products.
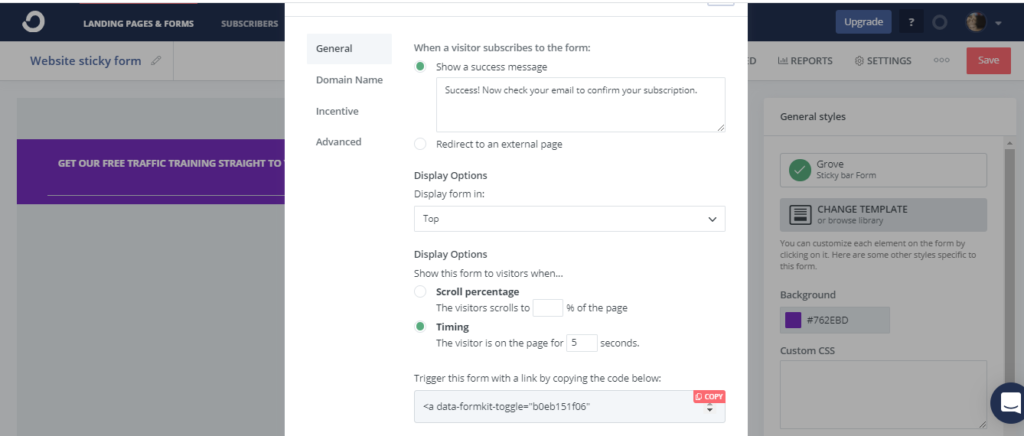

At this point set the Timing to 5 seconds as this is an ideal time frame to capture even the bouncing visitors.
At the bottom of the form ensure you set the time interval this form is shown to every visitor to 0. This will give you the advantage to grow that email list despite the number of return visitors you get.
You are more than welcome to add an incentive email so that you get the best emails for your list. this will make your list cleaning easier and simple. Below is an email think that you can model, change up, and even make it better.
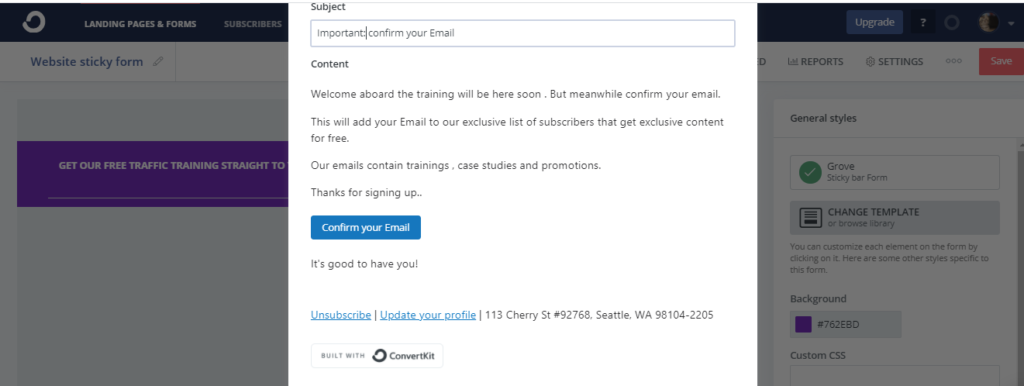

With our Incentive Email Done we are ready to embed it on our site. This brings us to the next step of adding Convertkit to Worpress.
How to add Convertkit to WordPress
Convertkit can integrate with your WordPress Website easily by just installing their Plugin and activating it on your site.
Here is how to do it . In the menu on the left of your dashboard , Click on Plugins>Add New>Search Convertkit in the search Plugins tab. It should look similar to this .


At this point install the plugin and then activate it. The plugin will then prompt you for your API key and API Secret which you can get by heading over to your Account Settings in the top right on your Account favicon .
Inside your Account settings , you should be able to see your own unique API key , API Secret and then add these to your wordpress following the simple instructions and Hurray Convertkit has been added to WordPress
All that fast and easy..
If You are using a Squarespace Website then Convertkit has an article on their blog in detail on how to integrate the Plugin with your site which you can check out here
Alternatively You can just add the HTML code to your site which is also quite easy to do as well.
This is how you can go about this.
Loving Convertkit Yet , Get your best Pricing Here Today
You will want to log into your WordPress backend. Head over to the Appearance>customize / widgets .
Any of the two will work. Ensure your form is set to appear at the bottom of your website if you are using the Widgets method.
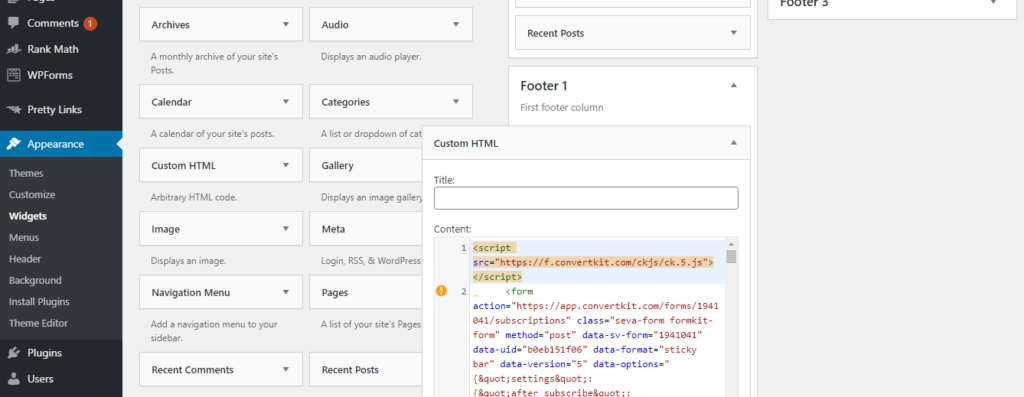

When you are in the widgets section, You will want to head over to the footer section and add a custom HTML.
Copy the HTML code from Convertkit and paste it into the box available. This will add your sticky sign up form to the footer of your website.


To add this sticky form to the top of your site, you simply need to copy the Custom HTML from Convertkit. Paste the code in the Widgets>Custom HTML in the customize menu under Appearance
Ensure this form is set by default to appear at the top in Convertkit.


How To Send Emails / Broadcasts in Convertkit.
Before I explain how to send a broadcast to your Email list am going to go over tagging and segmentation in convertkit explaining how they work.
Suppose you are driving traffic to your lead magnet funnel or landing page. It is important to assign the leads you obtain a specific name or phrase even a code you can memorize depending on their behavior , likes and even traffic source
Let me give you an example lets say you are a photographer , orown a photography blog and you are collecting leads interested in Nikon cameras and Canon cameras
Tagging the leads who are interested in Nikon cameras with a “Nikon” tag will help you differentiate them from those interested in Canon, Go Pro, and other camera brands.
Hopefully you got my point.
So how do you do this in Convertkit, It simple and takes a few seconds. Head over to the Subscribers Menu at the top.
On Your right , you should have a screen similar to the one below.
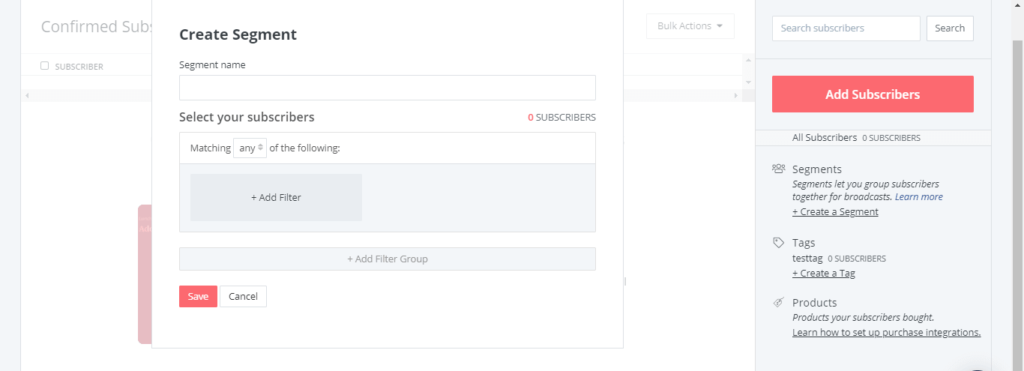

To create a Tag simply click on tags, create tag give it a name and you will be on your way. This is similar to creating a segment.
Once you have a tag created you can add subscribers to it by simply selecting them depending on the category or previous campaign you were running.
You can find specific Subcribers by narrowing down to the date of subscription.
For Segmentation, You will use this feature if you are planning on sending a broadcast email more on this later. The filters are added during this stage to find all the separated emails.
For example you had an email list that is interested in photography then you will segment these subscribers interested in Nikon camera and Canon at once and name them “camera lovers”
Then send them an email in bulk at once. That fast and easy. This is why I love Convertkit free fast and easy. If you have a large Email list and considering to move to Convertkit you can get your best price here as well
If you are planning on tracking your product sales then I would encourage you to read this article on the Convertkit blog to ensure you understand how to set up your product tracking.” For those shipping products”
How To Send A broadcast Email In Convertkit
Once you are ready and fully done organizing your Email list you are now worthy and ready to start communicating using Convertkit fast and easy.
And with my killer Traffic source you will be shocked how big your email list will grow in over a month if you use it wisely and follow my guide properly.
To send a Broadcast simply click on the Broadcast in the menu at the top and you will be presented with a screen like this. Click on create Broadcast on the right menu.
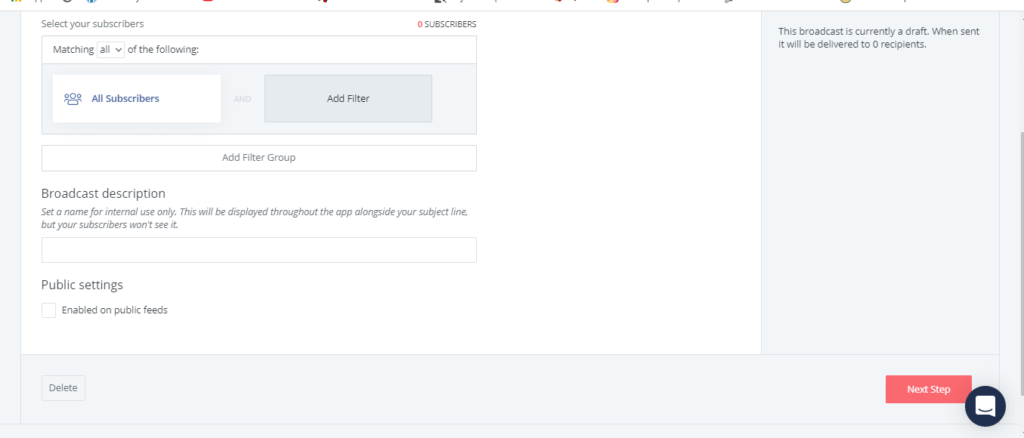

If you have aaniche list and you will want to send a broadcast email to all your subscribers then you are more than welcome to do that .
You can segments tags and other filters to help you narrow down to specific subscribers.
So play around with the filters and see which is the best filter as I don’t want to overwhelm you at the start….
To write your Emails, it’s simple send them helpful content from your blog if you have one and if you don’t have one you can send them tips to help them with their pain points which you should know by now.
Remember to always stick to my 70/30 rule of email marketing which is meant to have more helpful content in emails referring them to your blog rather than promoting to them all the time.
A secret trick is to send them to blog posts with affiliate links or your own products which does the indirect promotion they will love you for sending them free helpful content .
And by this method, you will be sure they will buy whatever you recommend…
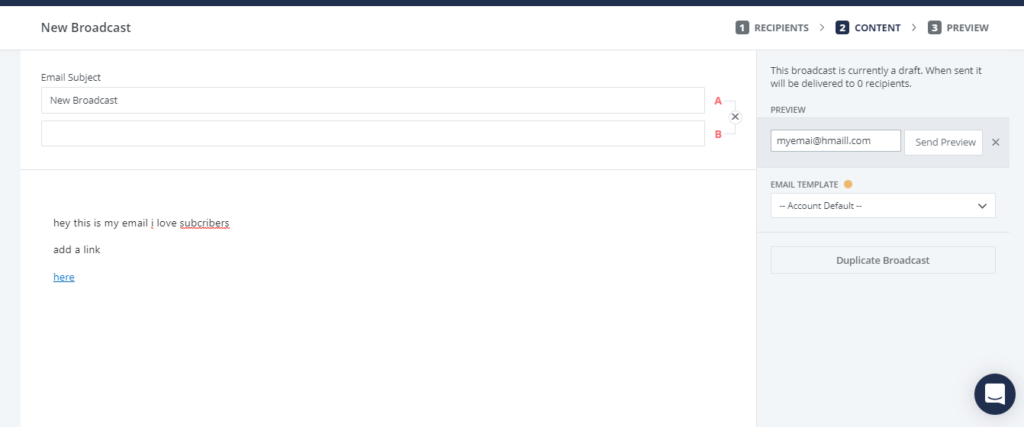

When you add links to your Emails you ensure they are short and this is where having a website is helpful as it is less likely to be marked as spam by these software .
You can add tags to those that click the links and get a clear understanding of the engagement on your emails.


How To Build Your Email List Fast In a Month With Convertkit
This is going to be my most recommended traffic source for even beginners . I have always been reluctant about this website / search engine
The traffic source we are going to use is Pinterest . With over 1.2Billion monthly visits its just enough to make a full-time living and grow your email list.
Pinterest is a goldmine for many bloggers out there many bloggers get a tone of traffic to help them make a fulltime living from their blog.
Here are the best tips To help you get traffic to your landing page and Website from Pinterest in 2021.
Driving Traffic To Your landing Pages and Website!
Just like google, bing, yahoo Pinterest is the 3rd largest search engine next to Youtube. It is important to learn the Platform algorithm’s best practices to help you get the best out of it.
Profile
Optimize your profile with keywords in your niche or think about what keywords your target leads my be typing into the search engine.
Pinterest will always suggets your profile to the most relevant search query.
Pinterest can get you suggested traffic fast with in a few weeks unlike Google where blogger we have to wait for months to start seeing traction on our content.
About section
You should as well add the most relevant keywords and niche keywords that you think your audience may be typing into the search bar. Add as many of these keywords as possible in a generic way.
Don’t do keyword stuffing. This is a bad practice on any search based Platform.
